Forums · Tails07's Mapping Tutorials Return!
My RPGMaker XP mapping tutorials are back! Since my old account was deleted I can't edit the old topic so here is the new one.
View the most updated version of these tutorials Here.
The first 4 tutorials are from the old topic with extra bits and new updated pictures.
Click the links below to jump to the tutorial or use CTRL+F.
Current tutorials in this topic
[iurl=#Grassland]Tileset 001: Grassland[/iurl]
[iurl=#Woods]Tileset 002: Woods[/iurl]
Coming Soon
Tileset 003: Forest
Tileset 004: Mountains
[anchor=Grassland]Tileset 001: Grassland[/anchor]
The first and smallest Tileset with only 144 tiles. The Grassland tileset is used mainly for camp sites and plains.
Lets start with a blank map:

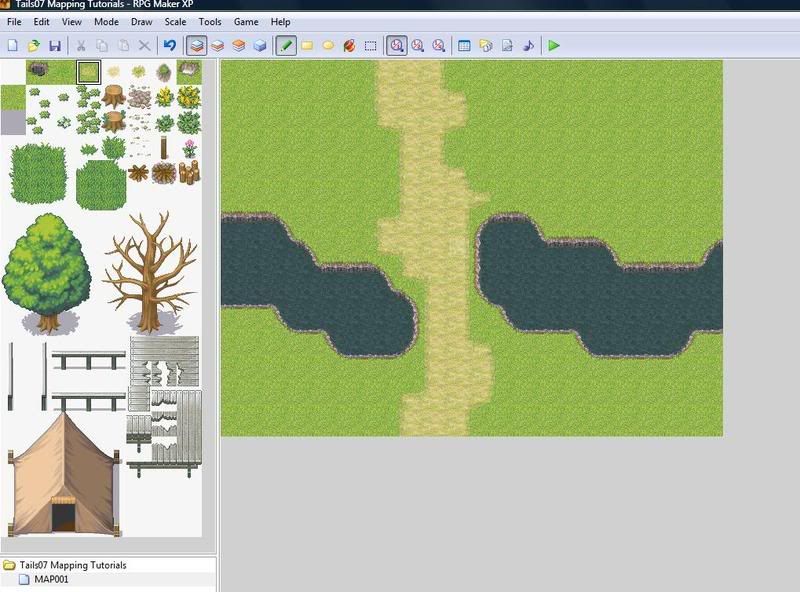
Next using the water autotile lets create a river on layer 1:
(The default water autotile can look a bit square and unnatural so a custom rounded one was made if you want to use the circle one here is the link)

Now lets add a path:
(Remember to make every look wild and natural only use squares for man-made stuff, like houses.)
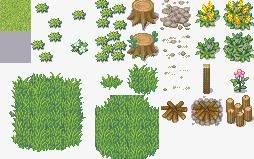
Next using layer 2 we will start to add the grasses and flowers, using these tiles:
Remember that this is not a city or town so make everything as wild as possible:
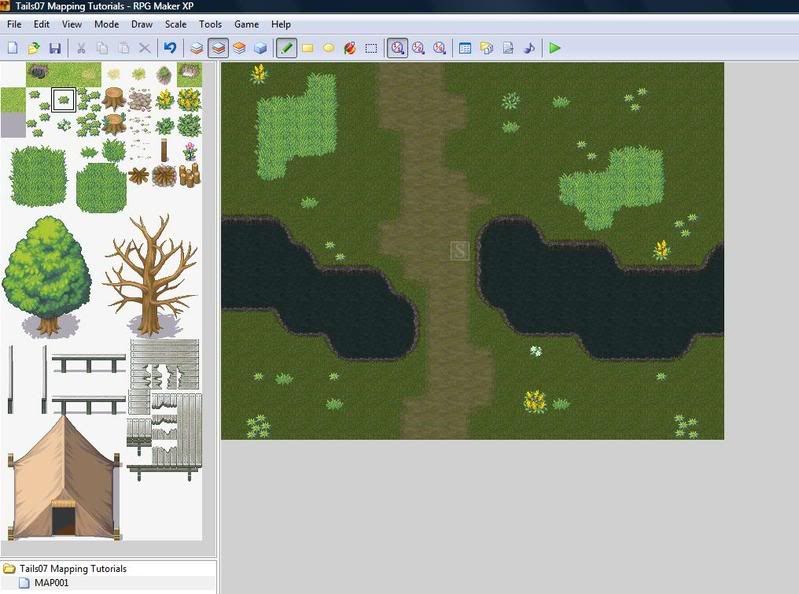
The grasses still look quite square so a simple technique can be used to make them seem more natural. Go to layer 3 and using the 2 small grass tiles make them look like this:
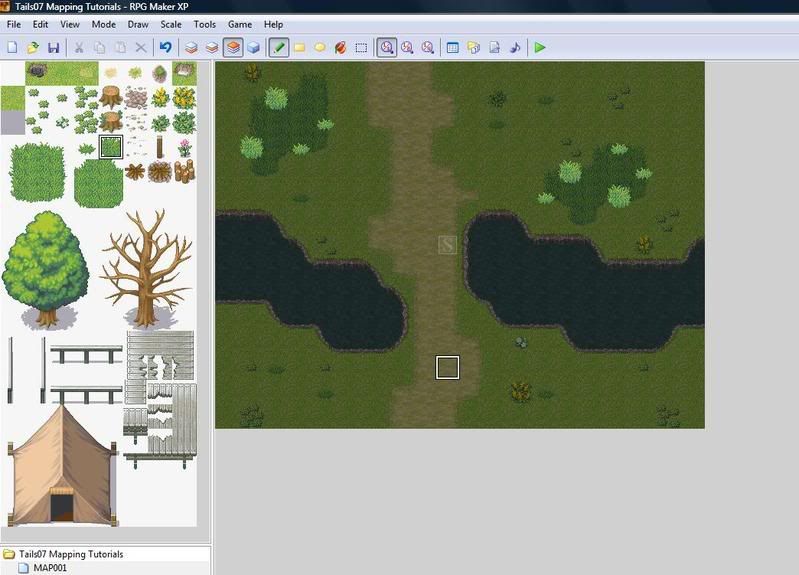
Still in layer 3 you can add trees and other stuff. Don't worry about overlapping tiles you have already put down:
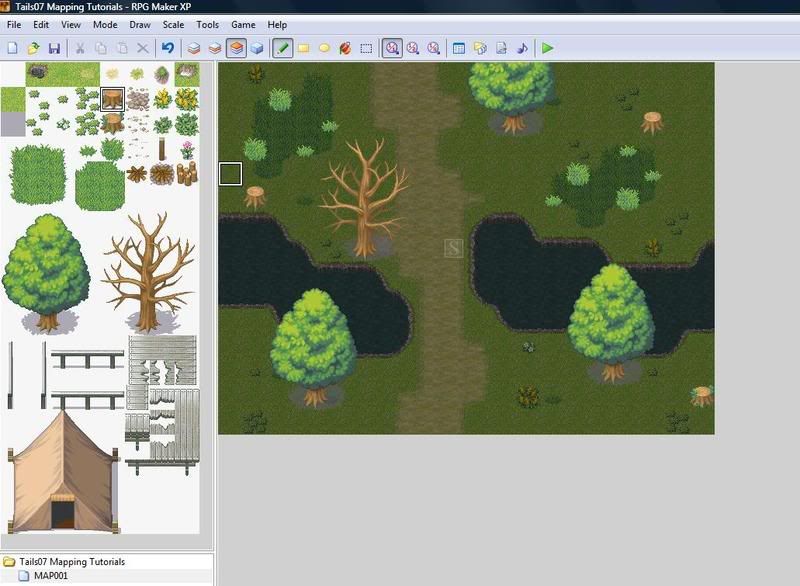
Finally use the event layer to add people and other events such as the camp fire. Also the fog command can be used to give the map a more real life feeling:
Design View:
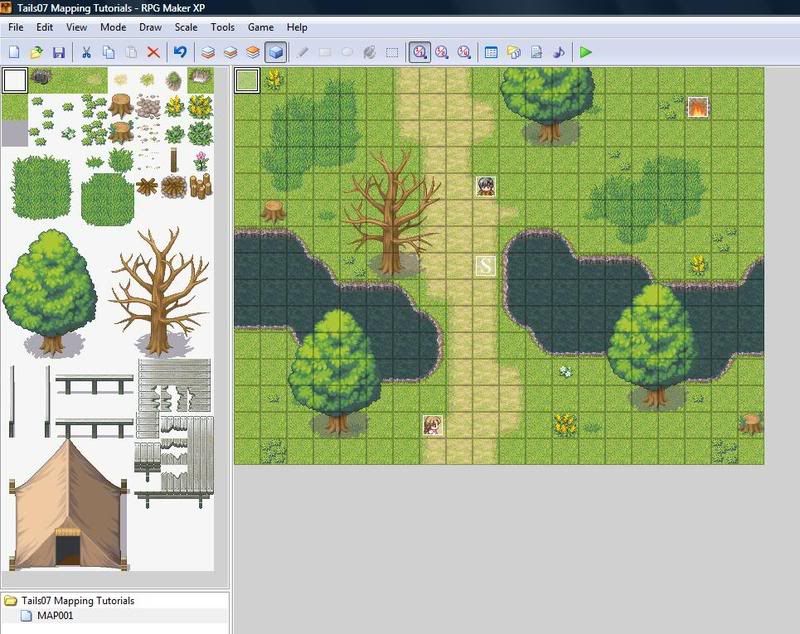
Game View:

And there you are your map is done. Don't forget you don't have to use 20x15 for all your maps make them as big and as wild as you like.
[anchor=Woods]Tileset 002: Woods[/anchor]
The second Tileset has 208 tiles. The Woods tileset is used for woods and forests that have a 'light' feel to them.
Lets once again start with a blank map:

This time i've increased the map size to 25x20 so I have a bit more room. Next add a stream, the paths and the grasses and small plants as taught in the previous tutorial:
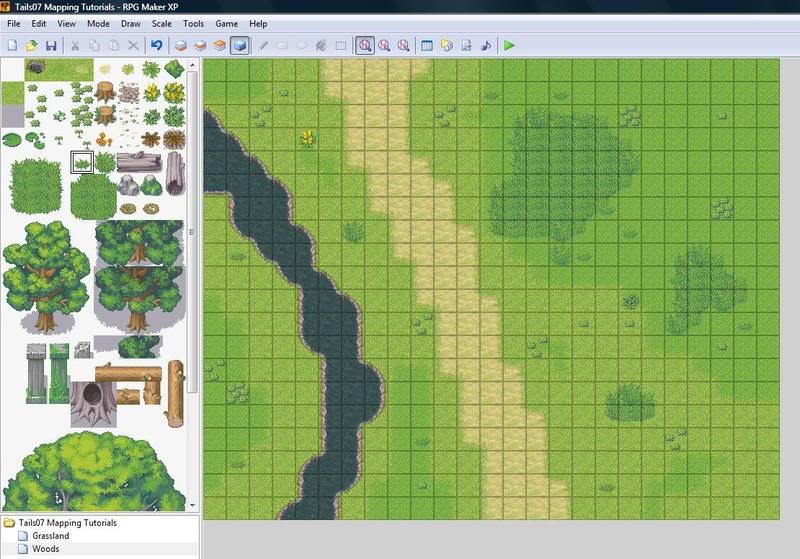
This make the map more eye catching. Don't forgot the number one rule of nature., Wild and Random. Stay on Layer 2 and start adding trees and other bits of eyecandy like rocks and tree stumps don't forget you can use layer 3 as well if you need to overlap the grasses.

In this tutorial i'm not going to use canopy tiles as they can hard for a beginner to use. Now on the event layer add some small forest animals, don't forgot to set their autonomous movement to parallel process. If you want you can use the fogs 003-Shade01 or 004-Shade02 to give your forest that real forest feeling. Fogs can dramatically change a map if you use them right.
Design View
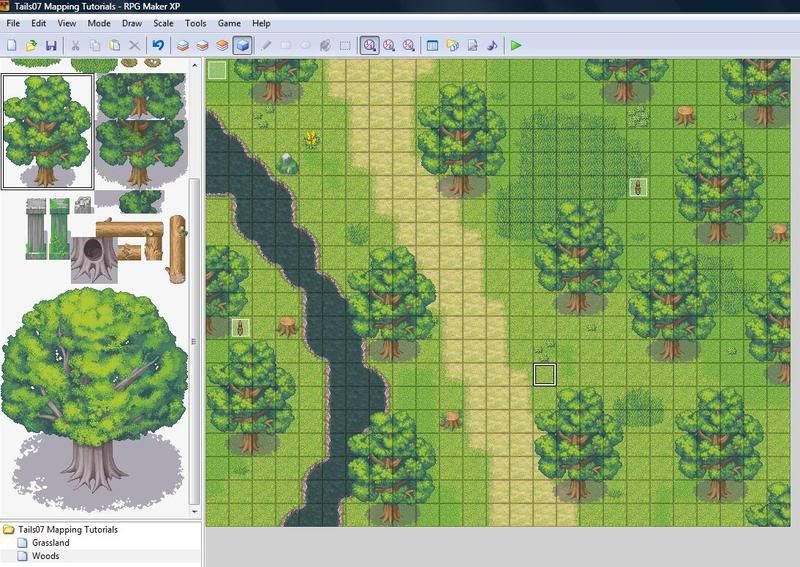
Game View
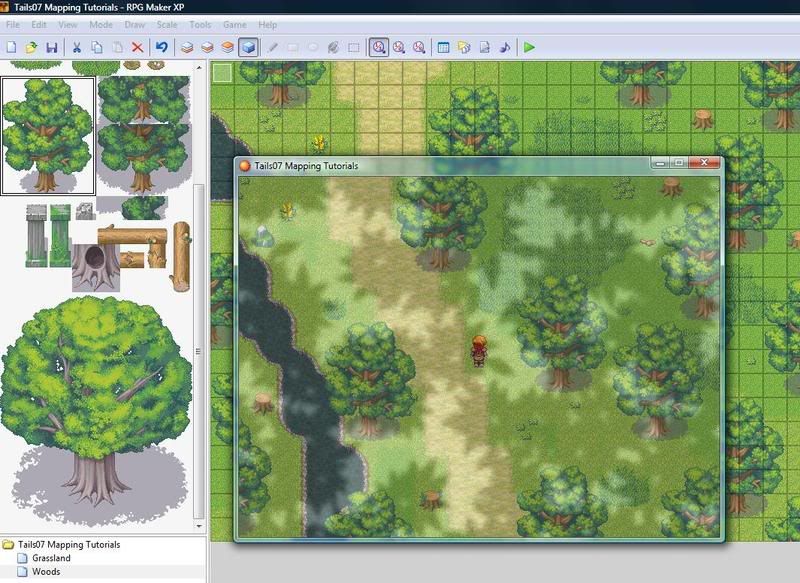
And there you are, your woods are finished.
Next Tutorial Tileset 003 - Forest
If you would like to post these tutorials on your site please contact me by PM.
View the most updated version of these tutorials Here.
The first 4 tutorials are from the old topic with extra bits and new updated pictures.
Click the links below to jump to the tutorial or use CTRL+F.
Current tutorials in this topic
[iurl=#Grassland]Tileset 001: Grassland[/iurl]
[iurl=#Woods]Tileset 002: Woods[/iurl]
Coming Soon
Tileset 003: Forest
Tileset 004: Mountains
[anchor=Grassland]Tileset 001: Grassland[/anchor]
The first and smallest Tileset with only 144 tiles. The Grassland tileset is used mainly for camp sites and plains.
Lets start with a blank map:

Next using the water autotile lets create a river on layer 1:
(The default water autotile can look a bit square and unnatural so a custom rounded one was made if you want to use the circle one here is the link)

Now lets add a path:
(Remember to make every look wild and natural only use squares for man-made stuff, like houses.)

Next using layer 2 we will start to add the grasses and flowers, using these tiles:

Remember that this is not a city or town so make everything as wild as possible:

The grasses still look quite square so a simple technique can be used to make them seem more natural. Go to layer 3 and using the 2 small grass tiles make them look like this:

Still in layer 3 you can add trees and other stuff. Don't worry about overlapping tiles you have already put down:

Finally use the event layer to add people and other events such as the camp fire. Also the fog command can be used to give the map a more real life feeling:
Design View:

Game View:

And there you are your map is done. Don't forget you don't have to use 20x15 for all your maps make them as big and as wild as you like.
[anchor=Woods]Tileset 002: Woods[/anchor]
The second Tileset has 208 tiles. The Woods tileset is used for woods and forests that have a 'light' feel to them.
Lets once again start with a blank map:

This time i've increased the map size to 25x20 so I have a bit more room. Next add a stream, the paths and the grasses and small plants as taught in the previous tutorial:

This make the map more eye catching. Don't forgot the number one rule of nature., Wild and Random. Stay on Layer 2 and start adding trees and other bits of eyecandy like rocks and tree stumps don't forget you can use layer 3 as well if you need to overlap the grasses.

In this tutorial i'm not going to use canopy tiles as they can hard for a beginner to use. Now on the event layer add some small forest animals, don't forgot to set their autonomous movement to parallel process. If you want you can use the fogs 003-Shade01 or 004-Shade02 to give your forest that real forest feeling. Fogs can dramatically change a map if you use them right.
Design View

Game View

And there you are, your woods are finished.
Next Tutorial Tileset 003 - Forest
If you would like to post these tutorials on your site please contact me by PM.
